Today I wanted to share a great tip about opening RAW images from Camera RAW into Photoshop as Smart Objects. I’ll first explain how you do it and then explain a little as to why you would do it.
The How

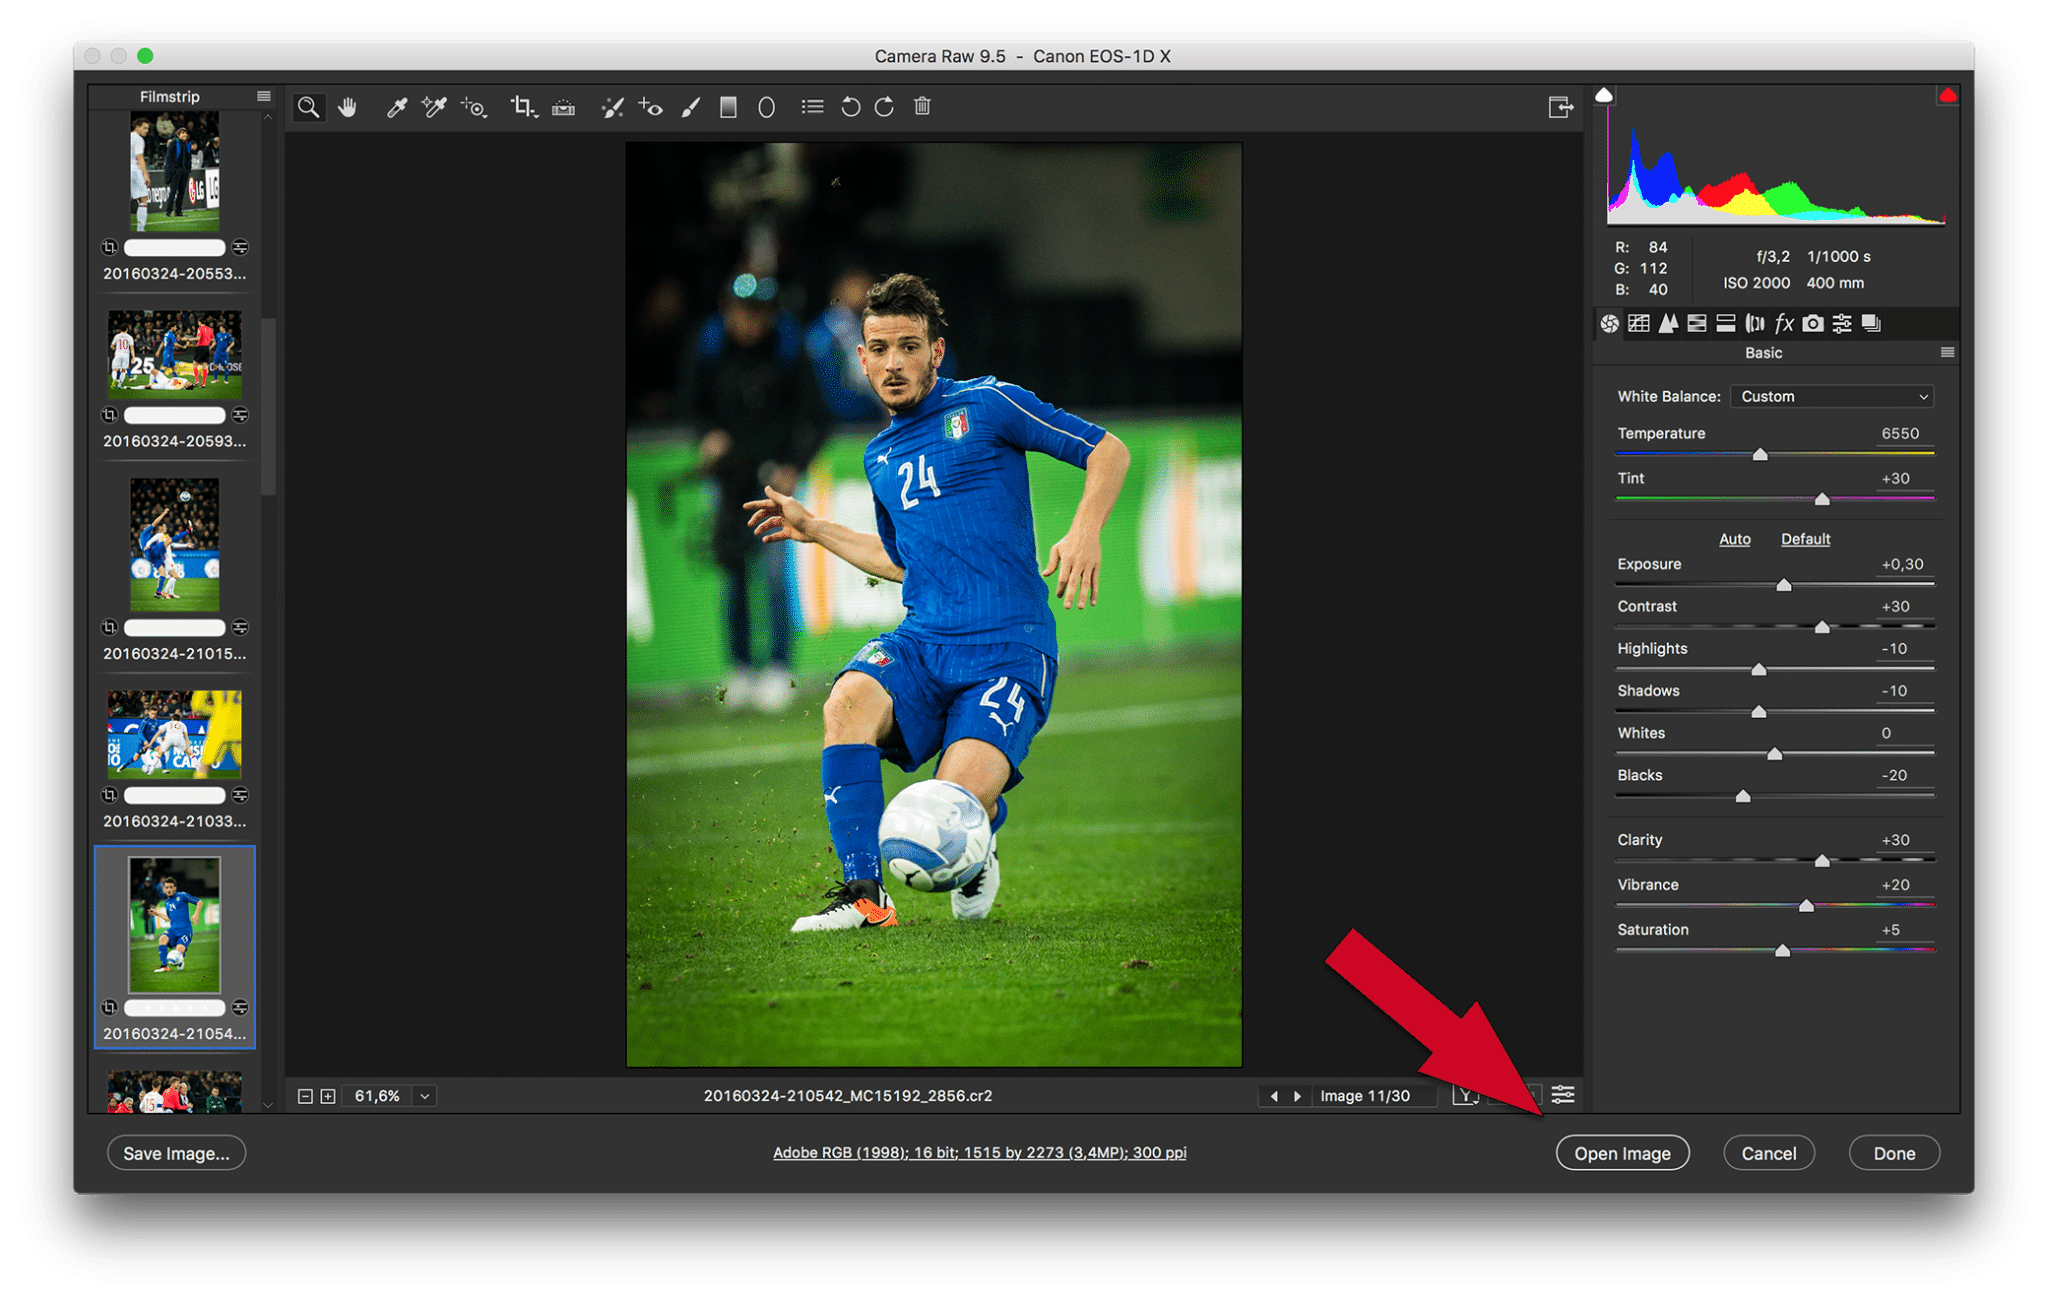
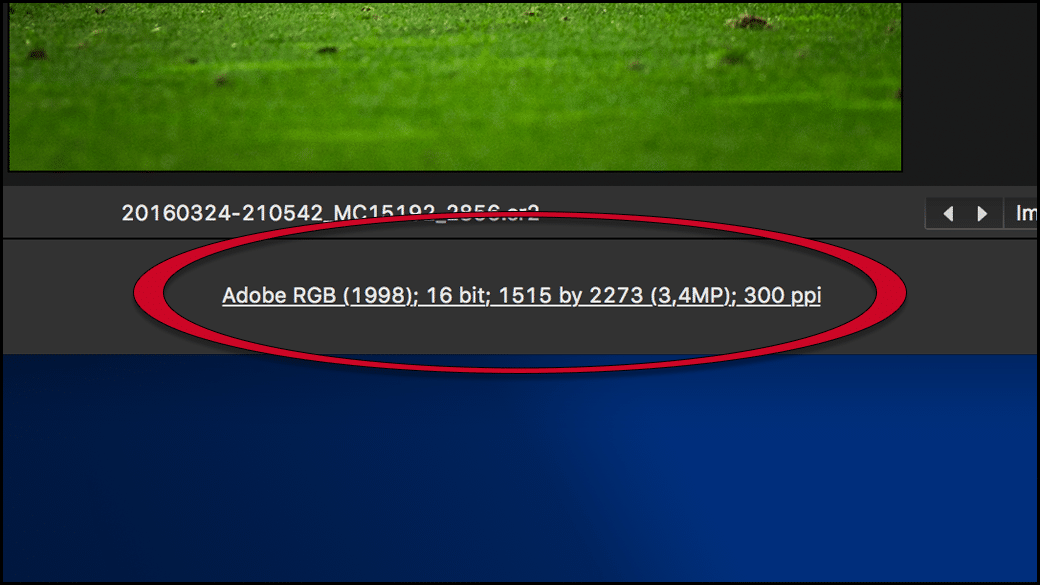
When you are working and editing images Camera RAW if you look at bottom there is a button labelled “Open Image” this normally opens the selected image in Photoshop. However you can change the behavior of the button by editing the Camera RAW settings by clicking on the blue link at the bottom of your Camera RAW window as shown in the picture below.

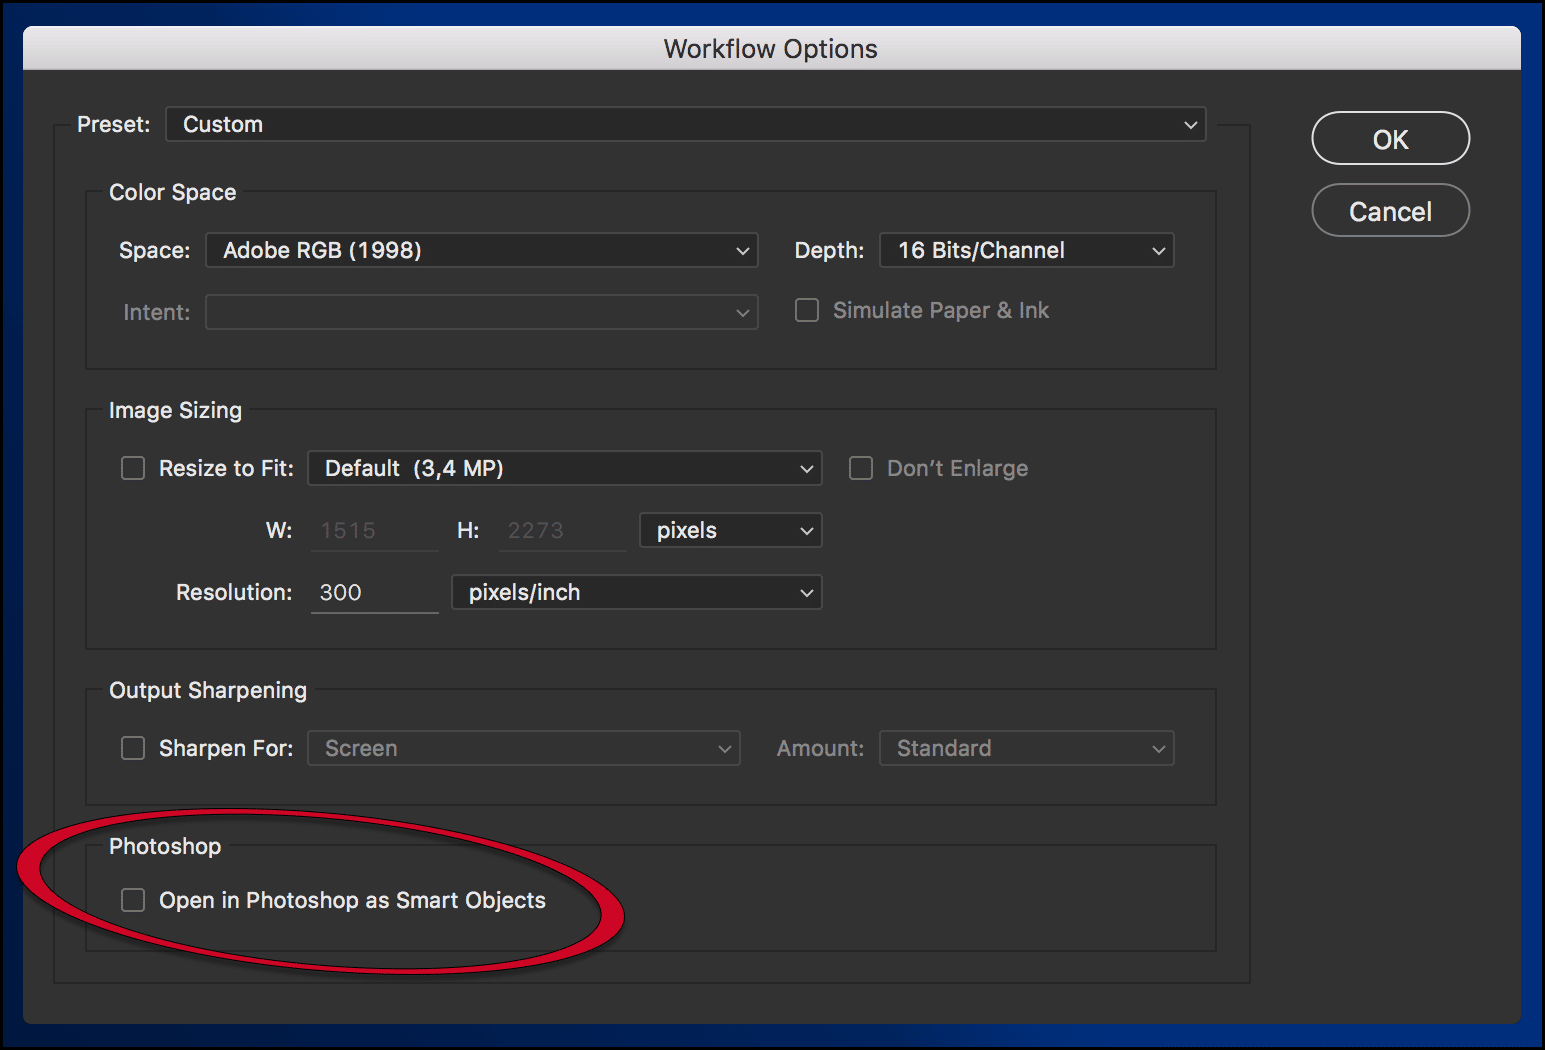
Once you clicked on the link you will get a pop-up windows with some options. If you look at the bottom of the windows you will find a check mark option labelled “Open in Photoshop as Smart Objects.” Activating that check mark will as you can guess change the behavior of the button from opening the image in Photoshop to opening the image in Photoshop as a Smart Object. When you go back to the Camera RAW application you will see the button is now labeled “Open Object.”

Turning on that check box means that every time you open an image from Camera RAW to Photoshop it opens it as a Smart Objects. Now there are some great reasons as to why you might want to do this, but there are also some good reasons as to why you do not want to do it. One of them being that enabling it will add to the size of all your image files.
If you decide you do not want to activate the check box and would rather choose on an image by image basis if you want to open as a smart object there is a simple way to do so. When in the Camera RAW window just hold down the Shift key on your keyboard. By holding down the Shift key you will see the “Open Image” button transform into an “Open Object” button.
** Note: This behavior reverses if you active the Open in Photoshop as Smart Objects check box I mentioned earlier. **
The Why
Now that you know how to open your Camera RAW images into Photoshop as Smart Objects it’s time to look at why you might want to do that. If you go ahead and open an image as a smart object in Photoshop you might not notice any difference, but if you look closely you should see some things have changed.
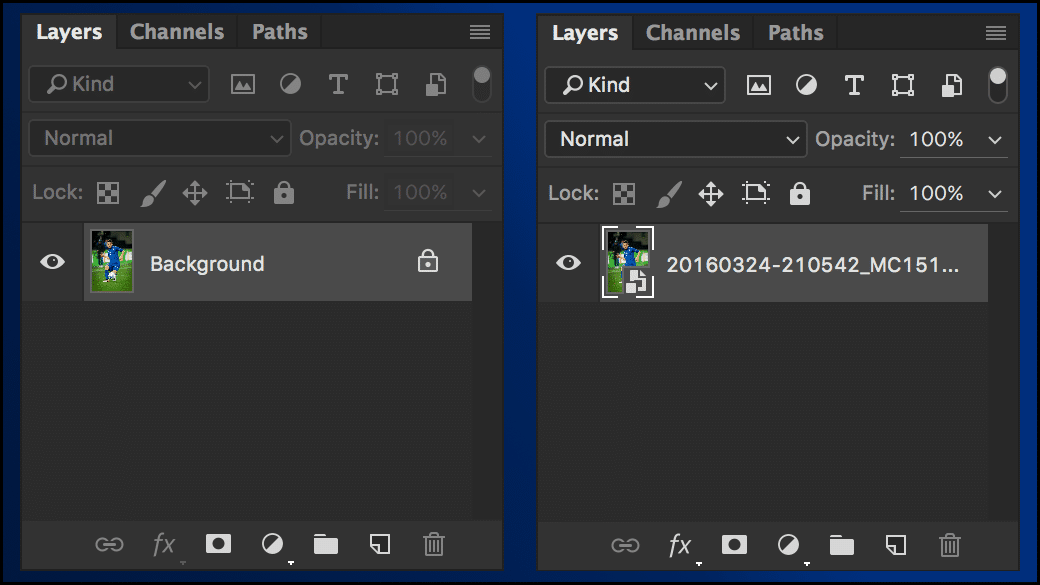
The graphic bellow features the layers panel from Photoshop. On the left the file has been opened normally as an image, while on the right it has been opened as a smart object.

Looking at the left hand side we see that when we open an image as we normally do the image appears on a single locked layer that has been named “Background.” Looking at the right hand side we see that when we open an image as a Smart Object it retains the original file name and is not placed on a locked layer. We also see that the image thumbnail has a small graphic icon placed over the bottom right side.
That icon makes all the difference in the world as clicking it will bring you back to the original RAW file in Camera RAW. That’s right at anytime you can hop back to the original file and make changes to your initial processing work.
Opening a RAW file in Photoshop as a Smart Object creates a link to the original file that can be accessed and updated at anytime.
That link can be an invaluable tool while working. Say you brought an image into Photoshop to do some final touching up, but you are not quite satisfied with the white balance or the exposure. You bounce back into Camera RAW make your changes and bounce right back into Photoshop without losing any of the work you have been applying from within Photoshop.
That’s it for today, hope you found this useful and start working more with smart objects. Thanks for stoping by!