Adding keywords images is something that’s been on my mind for some time now. Having moved into sports photography I am now shooting and importing thousands of images on a regular basis. I wanted to examine and improve how I keyword images in order to avoid finding myself with a gigantic picture library that is impossible to search through and manage.
Having put a lot of thought into it I’ve developed a 3 step approach that I can follow starting from when I import my images, continuing to when I rate and reject images, and ending when I touch up and export images. It might seem like a lot of work but it’s fairly fast as you add a lot of the keywords while doing other tasks.
Step 1 – Add general keywords on import
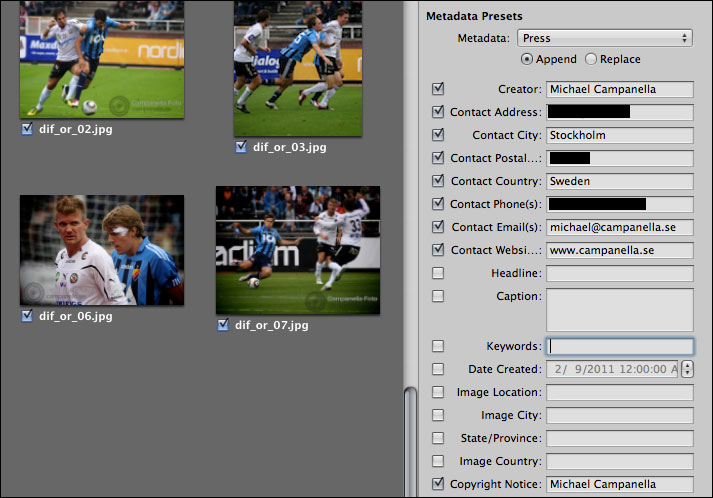
The first step is done during the initial import, when you first bring pictures from your memory card into Aperture. Here I add a set of generic keywords to everything I import into Aperture. I start with “Sports” which allows me to search and immediately hide anything in my library that isn’t a sport picture. I also add the name of the sport, such as “Hockey,” followed by the name of the league and the names of the two teams that are playing one another.

Right away before any image is even imported I’ve created a pretty decent set of hooks which you can use to systematically search for images. I believe that this will work very well over the long haul, and lends itself well to the European system of having multiple divisions in their sport leagues. For example it’s possible that a team is demoted into the second division one season. So having both team name and league name means you can easily search for images form that offseason when a team was demoted and playing in the second division.
Step 2 – Add action keywords and rate & reject pictures
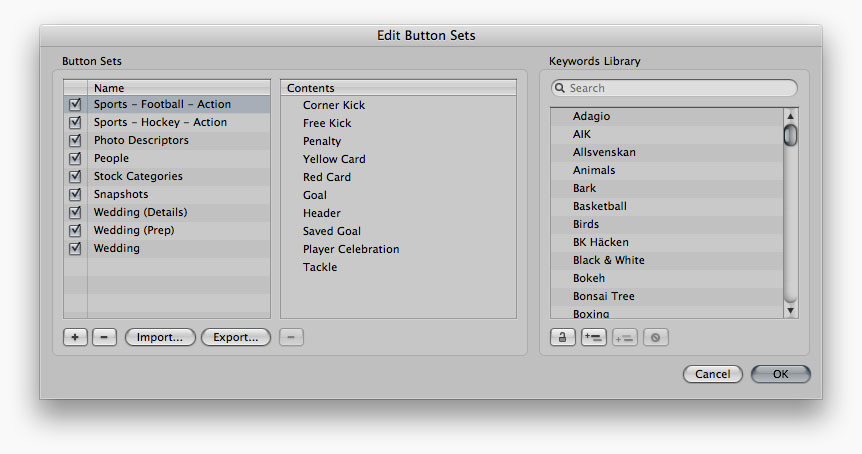
Having added the generic keywords and imported the images into your Aperture library I am now ready to start reviewing pictures. While reviewing pictures I want to take the chance to add more keywords based on the action occurring in the picture. To do this l use the Keywords control bar. You can show the keyword control bar, which is turned off by default, by going to Window and selecting “Show Keyword Controls” or you can use the shortcut Shift + D to toggle it on and off. When you activate the Keywords Controls bar you will see a bunch of your keywords displayed as buttons on the bottom of your screen. Now the great thing about the Keyword control bar is that you can create sets of keywords and you can then select which of these keyword sets is shown in the keywords bar. To make a new set just click the drop down menu and then select “edit buttons.”

What I’ve gone and done and what I recommend doing is to create set based on the situations of each sport. For example I’ve made a football/soccer set which includes keywords such as “corner kick,” “throw in,” “penalty,” “yellow card,” and so on.

With the keywords control bar active, and displaying the appropriate sport, I normally start reviewing pictures. I move through every picture and quickly reject and delete anything that isn’t up to par. I also take the time to give positive star ratings to the images I do like. As I’m going through this review process I use the keyword control bar to add keywords that relate to the action on the field. The good thing is that you don’t have to type anything just click on the button. You can select multiple images and then click on a keyword button in order to apply it to all your selected images. This is great when you shot burst and have several images of a goal sequence or a tackle.
Step 3 – Add captions and player names
Having completed the first and second steps, I have now added a set of general keywords and added a set of action keywords while going through and doing an initial review of my import. I should also now have a good idea of which pictures are winners and which pictures are just okay. As I prepare to send them out I normally go through them again, making minor adjustments like cropping and temperature changes.
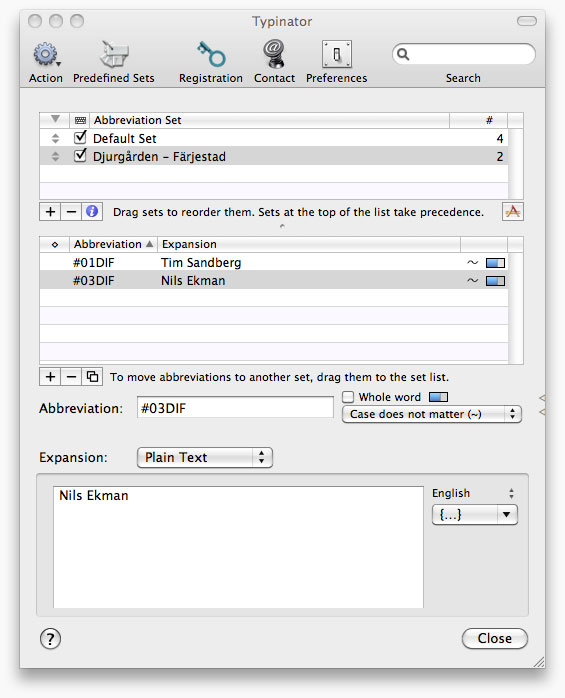
During this process I like to add captions to anything that is likely to be exported to clients or archives. I’ve found that the fastest way to do this captioning is by using a program called Typinator. Typinator is a program for OS-X that allows you to create abbreviations that when typed expand into full text. To make an example you can set it up in Typinator so that whenever you type in “copyMC” it expands out into “Copyright 2011 Michael Campanella Fotograf.” It’s a fantastic way to quickly enter in repetitive and lenghty text.

What I like to use Typinator the most for is dealing with player names, it requires doing a little work before hand, but it’s well worth it. What you do is take the team rosters and create sets where all the player names correspond to an abbreviation of the team name and the number on their jersey. For example “#01DIF” is set to expand into the name of Djurgården’s goal keeper. Meaning “DIF” is short for Djurgården and he’s got the number “1” on his jersey.
If you take the time to prepare this before hand the captioning process becomes so much easier. You never need to look away from the screen, so long as the player number is visible in the picture you can enter in the full name with a few keystrokes. It really just makes a world of difference to be able to skip the hassle of constantly looking away from the screen and down to a team roster on your desk.
Conclusion
So that sums up my current keyword workflow that I use when shooting football/soccer and hockey matches. If you found this useful please take a second to use the Twitter and Facebook buttons to share it. Don’t hesitate to leave a comment and tell me what your process like?